Solution? Andromeda ARO
Not sure what this is about? Have a look at the original prompt here:
Well, we asked the hive mind and 33 folks responded! What a turnout! This was the breakdown of responses:

There were only 3 options chosen:
- 18.2% – CC the Guijia
- 33.3% – Zapper Both
- 48.5% – CC Krit via Guard
Here’s the reasoning for the responses!
CC the Guijia
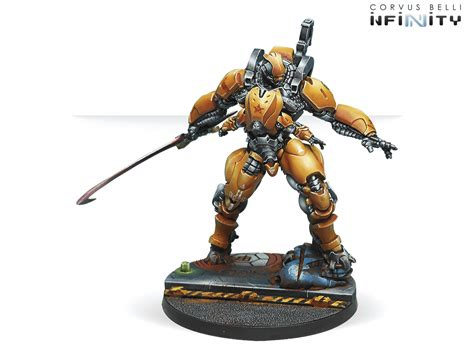
| Even though the CC of the dromedary is slightly worse, it has better Martial arts and mimetism -3, alongside the fact it doesn’t go unconscious when it gets to 0 Wounds so it could remain on the figth.I believe that, in general, one of the best ways to deal with tags is to do Melee on them instead of shooting them with bad weapons. |
| 1 cc difference but huge damage potential, dcharge on ap+exp and when you are out pistol breaker for ap+bts. Zapper could be good but krit is engineer even if success he can try to self repair, best way to make him loose order is to stay b2b with guija and krit if he come in b2b |
| the best option is opposing the CC, likely forcing repeated CC and the Krit to repair, since Andromeda is only slightly unfavored in winning each round this forces the most orders expended in this situation, otherwise Andromeda has a low chance of surviving a round of unopposed CC (dead in ~60% of the cases) making all other options much riskier the alternative would be the “high risk, high rewards” option of CC the Krit, as with a bit of luck (~20%) Krit is unconscious and Andromeda has survived the round against Guijia, now in position that is winnable with some luck and the opponent is a model down (at least temporarily) and duo would need to be rebuilt |
| Personally, I’d CC the Guijia, the Guijia has 5% better odds, but Andromeda has d-charges. The Guijia costs over twice as many points as Andromeda as well, which seems well worth the risk for 5%. Flash pulse is less ideal here, since she would be hit with MA and only be hitting on a 10 rather than a 21. Zapper is tempting as well, but avoidable with a dodge which, like you’d mentioned, would let Krit move into CC |
| Andromeda is likely dead, and pretty unlikely to score a kill in this scenario, and even killing Krit leaves a Guija free and only a couple orders down once they work through NWI. CC with the Guija isn’t a great option for anyone, but it’s your opponent burning orders, not you. Unless Krit needs to die to prevent him from scoring something, I think you force your opponent to flail away in CC for as long as possible. |
| Simple, CC with D charges can destroy de Guijia, remember is their active, and Krit is not a menace, if you win, 2 Things, 1Guijia is in CC and cannot doing more than Dodge or Cc attack, your armi is safe from he, 2 Guijia is destroy and if Krit activates, another cc attack. If you use the zapper, you will die for nothing…alwais is better survive and block enemi troops. |
Zapper Both
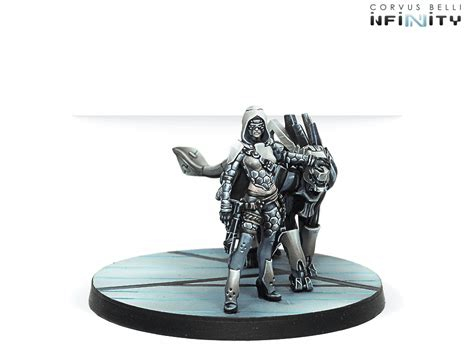
| Your chances to have them fail a roll is much better and there is a possibility of Andromeda surviving the DA hit from the Guija. |
| Zapper is the option I would go with, considering if both fail their dodge rolls then they’re locked down. If both template, then they’ll have to tank E/M saves. And if they do dodge into CC, Andromeda might beat them in CC or die herself but hopefully it will drain orders from the other player. |
| Zapper Both Any option where they do not dodge but instead shoot/CC to kill Andromeda they are taking an E/M against two models that are severely affected by the E/M State. Because the faction is Vanilla YJ there is a low likelihood that there is another engineer to get either model out of the Isolated/Immobilized state. With both pieces being significant for the opposing game plan this will lead to the opponent having to make the choice of either to risk the free E/M attack and confidently delete Andromeda or dodge on an iffy chance for the Guijia and ok chance with kokram. This sequence has the highest Upside while forcing you opponent to commit to likely “losing” at lease one piece in exchange for Andromeda. |
| The Zapper’s E/M ammo has the potential to take both out of the game for quite a while with just one failed saving roll (for Krit 80% and for the Guijia 75% to fail). Thus the YJ player will most likely choose to dodge* which eats up an order to kill her. Then with her next ARO she could try to either contest the Guijia’s two hits on 22 or to sacrifice herself in order to kill Krit*It actually doesn’t matter if the YJ player will get into BTB contact by dodging since the next order would be spent for that anyways if Andromeda would still be alive. |
| I considered zapping both or CCing the Krit. As it’s a beginning of the game it’s still realtively safe to make risky decisions – trading Andromeda for Krit (and i believe that CCing him would end that way) is a low risk low reward decision as they are similar in cost and ‘usefulness’. Zapping both models forces YuJing player to make some bad choices: if he decides to CC Andromeda with Guija he can end up with both models immobilized and isolated. If he chooses to Dodge with both, they still can be hit (although chances are much smaller), but he will need one more order to be able to CC attack Andromeda and there’s no guarantee that it will be enough to kill her (as CC between them would be a 50:50 gamble). On second thought i think that while zapping is still best choice here, CCing Guija is second good option – with a little luck it will cost YuJing player several orders (and a wound to Guija) to get rid of her and on first turn it may mean that all advantage from going first will be wasted. |
| So I actually spent a long time thinking about this with a friend. Obviously as an ARO we want to waste as many of our opponent’s orders as possible. This means killing models (because dead models don’t give orders), or just making the opponent’s active turn really inefficient. We immediately decided that the answer was NOT to CC the Guijia. The Guijia wants to engage Andromeda in CC anyway, so it doesn’t slow down the active players natural progression. Furthermore Andromeda is unlikely to kill the Guijia, so there won’t be a loss of orders from that perspective. And finally, Krit is an engineer and he’s standing right next to the Guijia, so doing 1 or 2 wounds won’t matter. So we started thinking about whether we should Zapper both or CC Krit. The advantage of using the Zapper is that it forces both models to dodge (which means the opponent isn’t going to kill Andromeda in that order), and it stands a good chance of removing a model (or both!) from the game. Krit is most likely the YJ player’s only engineer which is both a good and a bad thing here. It’s good because it means that if the Zapper goes off on him, then the list won’t be able to repair him (he’s most likely the only engineer) AND the Guijia becomes very vulnerable (because again – no engineer). On the other hand it means that if the Zapper hits the Guijia, but NOT Krit then you fail to do much because Krit can repair the Guijia. The upside of CC’ing Krit is that it will force both models to dodge (unless the YJ player wants Krit to just take the D-Charges unopposed). This means Andromeda won’t immediately die. It’s also reasonably likely that Krit immediately goes down. I checked it on the dice calculator and it’s approximately a 50% chance that he literally goes unconscious in that order. Which is AWESOME. But the significant downside here is that, unlike the Zapper, it doesn’t threaten both models, and a 50% chance to send a single model unconscious isn’t really that good on turn one because the list might have a medic. Furthermore a 50% chance to send Krit unconscious isn’t that good when the alternative is putting an E/M template on TWO models. We decided that the correct choice was probably to threaten both models with the Zapper. It forces a dodge out of both enemies, which is great, and it’s an outcome that’s very likely to do something. It also has the highest chance of causing absolutely catastrophic damage. Whilst using D Charges on Krit is good, it has a significant chance of not doing very much at all, and even if it does work, it might not change the game that much (depending on the YJ player’s list). The Zapper on the other hand has a decent chance of doing at least something, and has a small chance of immediately putting the YJ player in a horrible position. Furthermore the Zapper play has a secret benefit afterwards. If the Zapper fails, the YJ player is likely to break the fireteam and move Krit into CC, so that they can hit Andromeda with a burst 3 heavy pistol in CC (multiple allies in CC together giving a burst bonus). This is advantageous to Andromeda because whilst this appears to be good odds for Krit it’s actually NOT. Andromeda is moderately likely to win that face-to-face. So an added advantage of the Zapper play is that if it fails, it presents a line of play to the YJ player that looks very good, but is actually not. This might be a weird line of reasoning, but if Andromeda starts by D-Charging Krit and winning, it’s likely that the YJ player shoots into the CC with the Guijia to easily kill Andromeda. But if you go for the Zapper play and fail it almost encourages the YJ player to take a further line of play that’s not very good. So the Zapper wins. It has a higher outcome floor than the D Charges AND a higher ceiling too. And it presents a secret poor-choice to the YJ player for their next order, if it fails. |
| You force both to dodge, with the chance of them to go imm and isolated they won’t take any other option. If by any chance you score the hit, that would mess their game a lot. If they dodge and decide to go into CC you still have a reasonable chance to win with martial arts, so it’s not a safe bet they will get you. Even if they do, they are just wasting more orders in active turn to do so. |
| Zapper forces one of three decisions for the YJ player: 1. They dodge into CC, potentially with both. 2. They respond with templates themselves on Andromeda 3. They respond with CC from the Guija, effectively scoring a clean attack on Andromeda.The reason the Zapper is most critical in this situation is because you are forcing potentially 118 points of the YJ player into IMM-B and Isolation, and maybe the LT, and definitely an NCO model if they opt against a dodge. The odds of the Guija failing the dodge are relatively high at as they roll on 11s, and Krit is rolling on 13s. These aren’t great odds for making the dodge. Any failure results in catastrophic loss of a model. If the Guija fails a dodge, they are eating two saves that they need to roll 11s or better on. Krit is actually rolling on 12 or better. These are not the odds you want to look for. Additionally, by avoiding a F2F roll, you are forcing the YJ player into a dodge. If they opt for a template, they can almost promise a kill, but it’s not going to be in their favor. Taking BS Attacks are also a poor choice as Andromeda has Mimetism, These odds become even worse if Andromeda has cover from either model. Resetting out of the state inflicted from failed EM saves on either Krit or the Guija are on 2 and 1 respectively. These are horrible odds for the YJ player, and not ideal for them to struggle against for the remaining chunk of the game. Lastly, Guarding Krit will likely ensure a kill, but a F2F against the Guija is key to ensuring you have another opportunity to force the YJ player to spend orders. Guarding against the Guija isn’t a great situation, as this will effectively be a wash, as both players inflict +3/-3, with the Guija only losing 1 point of damage via being only MA2. This engagement isn’t in Andromeda’s favor, as she isn’t getting a burst bonus, and will suffer -3 for using D-Charges in CC. The Guija will have better chances of winning the F2F, then have the option to handle Andromeda as they see fit, if at all. Thus, the Zapper is the best choice as it forces the YJ player to spend another order to ensure a kill, and risks them potentially losing the model which could pull the Guija out of IMM-B/Isolation to the same IMM-B/Isolation. Even if they succeed the resets on the first try of the next turn, you have effectively placed 33% of the list into LoL for the next turn, which could be a full blown LoL if the Guija was the LT. |
| Makes the active player choose something more dicey rather than just walking into CC or shooting. The PH on krit and the TAG aren’t the best, the payoff if they fail their dodge is really high. If you’re in this situation with Andromeda she’s probably dead so removing your dice from the equation I feel makes the template more of a sound option. |
| I think it’s really close between CC’ing Krit and using the Zapper. I like CC’ing Krit to just guarantee taking him off the table, but I’m going to go with using the Zapper. If they succeed the dodge and both go into CC, you can still just CC Krit on the next exchange anyways and if the Guijia just goes for the kill, you have really good odds of bricking both – not to mention that dodging on 11/12s feels pretty bad. So ultimately, this is just CCing Krit, but they have to burn an extra order. As an aside, if the IA player successfully dodges with both, they could keep Krit out of CC and just shoot at Andromeda on 7s (and rely on the Guijia just tanking stray hits), but I’m not sure how good that would be.I’m really curious how this turned out in practice! |
| 100% double zapper. The guijia is only dodging on 11s tops, both models are relatively expensive and even with engineer they will just keep provoking more AROs as either of them attempts resets or engineering rolls allowing you to melee/guard the offending units. |
CC Crit via Guard
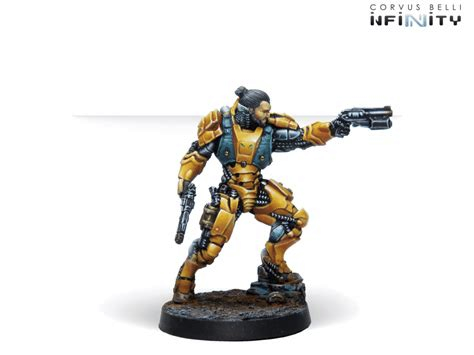
| Andromeda is in a terrible spot, and likely should’ve picked a different spot to infiltrate to. Killing Krit eliminates the Guijia’s backup, has good odds of happening, and is likely going to die anyways. Trying to damage the Guijia would be a waste since it’ll be healed right back up. |
| Unless you crit you can’t remove the Guija from the table and then Krit can just repair it so removing Krit first is the better play in my opinion because there is a good chance that you make him unconscious with your Dcharge. |
| This will depend likely on if the opponent has a way to revive Krit on-hand. Given that it’s vanilla YJ, they probably don’t. So take the very likely trade up, especially if your opponent is the one spending the orders. Taking out Krit will also likely deny your opponent a relevant use for a lieutenant order or two. |
| I’d choose Guard CC Krit because: A) The Guijia has a good chance of killing Andromeda, but Krit can, and will, fix the Guijia if left alive. B) Krit would add a +1B to the Guijia if he makes it to CC. |
| Biggest chance of inflicting actual damage (loss of Krit) on the YJ player before losing Andromeda |
| More chance to kill something. Andromeda is going to die anyway, no matter the choice, she is going to die. No aro, dodge, flash pulse are not an option here. Zapper is risky and they have 16 and 13 for PH, so more than 50% to win the dodge into CC. CC the Guija with bad Odds are a pretty bad answer. CC krit in a non-opposed roll is acceptable.Krit doesn’t have NBW, so Andromeda’s Martial Art L3 gives her +2Dam and +3 Attack Mod. She is going to hit no matter the number on the dice, with 20% chance to crit, dealing at least 3 armor saves (or 4 if critting), damage 17 (Dam14 D-charges + 1dam in profile + 2dam MAL3).Krit will have a decent chance to lose his Wounds. He has 3armor and so he has to do more than 14 with at least 2 dice…One kill for another, and it’s way easier to kill Krit than the Guija. That’s not worth it, but none of the other AROs are.That’s a nice puzzle! Look forward to answer other puzzles! =) Cheers |
| Imho Andromeda will not survive the turn of the Yujing player and a removal via d-charge of a imported model is worth it, Zapping would be my option number 2. |
| Cash out now, Kill > E/M, odds are low on all gambles |
| Best single chance to kill a model, even if andromeda dies in the second order half from the Guija you’ve traded up a few points, and more importantly, removed the NCO engineer. If you target the Guija with cc then you risk not finishing it off and Krit just repairs it anyways. A tag without the engineer is much more vulnerable to other forms of removal so removing Krit is the most valuable option here. The zapper has the best possible outcome of immobilizing both, but the odds of getting both are low and compared to a guaranteed CC hit its not worth the risk. Dodge is situationally useful only if you could get out of reach of the Guija while maintaining guard reach to Krit, otherwise its better to trade into Krit. Flash pulse is silly but worse than zapper. Overall: CC Krit>CC Guija>Zapper both>dodge (good situation)>flash>dodge (other situations)>nothing |
| You’re guaranteed a hit and have a 20% to crit with decent odds to take Krit down which is a decent trade. Your odds of survival are slim but not zero Dodge has low odds against the tags CC, zapper both will cause them to dodge and only pays off if they are both bricked, Krit is an engineer and can repair the tag out of the bricked state. CC the Guijia: you’re one pip lower on CC so the odds of success are not great. Flash pulse the Guijia isn’t great either, lower odds of success against the tag’s CC attack and even if you win you’re locked in CC and Krit can then walk in and B2 CC you with a D charge. |
| Slapping a D-Charge on Krit seems like the optimal move here. As far as I’m concerned, Andromeda is already dead. She’s over infiltrated and she’s now in a CC fight with an ARM 8 STR 3 CC Specialist TAG who’s next to an Engineer. I’ve been in similar situations before, the TAG almost never dies here, and it almost always kills Andromeda. So, with that in mind, I see two options: Try to do permanent damage, or try to waste as many orders as possible. Option one is what I probably prefer. There’s a chance to knock Krit unconscious to screw up the sustainability of this primary attack Duo, and with good rolls, Krit could even die, which is a great trade now that I’m resigned to trading. Plus, with only a DA CCW, a one burst HFT, or a bad range vs mimetism HMG, there’s a decent chance that Andromeda, with her ARM2 and NWI, survives the first hit from the Guija and gets to CC fight the Guija with her D-Charges after putting Krit unconscious/dead. Without Krit, the Guija CC fight goes from a kind of order intensive way to remove Andromeda to a horrible swamp that will tie up the Guija and be a massive headache. Even one wound on Krit is fine though, since it’s a wound and can’t be repaired like STR.For trying to waste orders, I think the options to accomplish those have too much variance and are generally too unreliable. Dodge, FP the Guija, and CC the Guija all end up with the Guija CCing you in response, and then you’re going into a f2f roll that you are, in all cases, probably going to lose. Putting a Zapper on both is option number two for me, but has the best possible outcomes. If you manage to E/M both Krit and the Guija and also either not die to the CC hit or they fail their dodges, that’s probably the best position you can be in (outside of maybe critting the Guija off the table with a D-Charge?). The issue there is that you’re shooting for a best possible outcome, but the second and third place options all end up looking not great for you. If you lock down both of them, but Andromeda also dies, good players will know how to recover from that without too much issue. If Andromeda doesn’t die, but one of them stays active, good players can deal again. All in all, yes, there are good outcomes down this decision path, but they’re unreliable and most of them aren’t great for you.So, in conclusion, I guess I’m making an argument for consistency and shooting for multiple decent to good results instead of gambling on a best possible outcome. You are very likely to deal at least one wound to Krit if you D-Charge him, and it’s not unlikely you’ll knock him unconscious (and potentially kill him), which will be a pain for your opponent the whole game. If you try to pull some fancy tricks and Zapper, there are a few very good outcomes there, but a lot of the time Andromeda dies without accomplishing much, or you end up costing your opponent a couple of repair orders that they were already planning on spending (they brought Krit after all, they wanted to use him to repair!) |
| While the double zapper has awesome upside it allows the opponent a decent chance to avoid serious consequences through dodging (plus possible saves!) and the potential to recover quickly in the event of a mixed result (Krit fixes the guija/andromeda is locked in CC). By declaring ‘guard’ Krit will likely go unconscious and there is a moderate chance andromeda survives the guija either shooting at -6(or -9 in cover) or andromeda passing at least one of two flamethrower saves. The long term effects of trading for Krit (assuming they both die on this order) are the guija not only must be more conservative because of no engineer but effectively loses 5 orders (3 NCO spends plus 2 regular from downstream turns). |
| I’d try to trade my Andromeda with Krit. D-Charges and Martial Arts give me a slightly-above 80% chance to kill krit. With such, I disable NCO for the Guijia link and can prevent up to 6 orders from being spent on moving Guijia forward and make disabling him easier. Cc with the Guijia is close to a coin flip and will more often then not leave the Guijia standing – next turn I then got 2 burst against me, or a multi rifle shooting into CC. This seems unreliable. If I Zapper and don’t get both disabled, Guijia will rip Andromeda into pieces. If only Krit gets disabled, Guijia can continue his rampage. Similar outcome as CC, but less reliable the the D-Charges. If only Guijia is disabled, Guijia will still most likely kill Andromeda, and then Krit needs to spend one order to get him back up. Flash pulsing Guijia also is unlikely to make it, and will leave Krit with the option to kill Andromeda next turn and repair the TAG. |
| The zapper sounds more like an end game last ditch move. Dodging on 11/12 is not terrible. CC Guijia sounds only useful if you’re trying to burn down orders. CC 21 vs 20 is basically a toss up and even if Andromeda wins, it is highly unlikely to do much against the TAG. CC Guard on Krit is either unopposed or, better yet, a dodge attempt on 9s. Highly likely that you will trade Andromeda for Krit. Not knowing the rest of the Aleph force, I have to imagine there are some comm attacks still available to deal with the TAG. Early game can absorb the trade easier and removes the engineer and NCO feeding the TAG. |
| there is a way to answer this question that optimizes your probability of success, but the real answer is that if you have the chance to CC with a D-Charge, why pick anything else? a more thought out reply is that Krit can’t respond face to face so it’s impossible to fail and that’s 3 to 4 saves he has to make at arm 2 against damage 14, which has a fair shot of pulling off at least one wound if not putting him unconscious or dead. at relative point values this is a trade up, especially if Andromeda makes one save and continues for another fight on NWI. even if she dies, as long as she takes Krit with her, Yu Jing loses at least one resource to pick up the Guijia if it goes down as well as a credible specialist and NCO order. this potentially slows the advance of the Guijia as well as forces more careful play, especially since a linked engineer can’t rescue it from immobilized states either. the upside is really attractive here.zapper and flash pulse are options but the high BTS of the Guijia makes me think that it tanks the hit either way and a zapper trade for both is unlikely and she just dies. close combat on the Guijia is attractive in that while Andromeda is probably less likely to land the d-charge, but double crits means a waste of orders trying to beat her down in CC. but if Krit comes in the next order, then the extra burst goes against her anyway. if she takes the hit and survives a DA hit she soaks up an order, but she’s doing that any way if she kills Krit and isn’t killed by the Guijia. overinfiltrating was a big risk. putting Andromeda out to guard a 3 str tag was not meant to a be a fight she can win but a way to deprive it of wounds and/or resources so another tool can finish it off. Krit is too juicy of a target to consider anything else. |
| This is tough. If you cc the Guijia, you may well die for nothing or damage the tag right in front of an engineer. Even though you stand a chance of killing the tag there should be enough other models near Andromeda that can shoot her without generating a guard ARO, so if you don’t kill the TAG in one order you lose Andromeda for nothing. I would bank the opportunity by d-charging Krit. He’s easier to kill, a roughly fair trade for Andromeda, but more importantly you remove an NCO, Engineer and scoring specialist on the first order of the game. The Yu Jing player has likely built in a Daoying to spend two lt orders on Krit and the Tag, so you kill that as well as any opportunities to repair the tag for the whole game. Krit is an expensive and resilient engineer choice, so probably the only engineer. |


Pingback: Puzzle: Hack the Planet? – Infinity the Academy